The WordPress Post Templates

In the last article we used the WordPress loop to begin putting post content on our pages. We’ll do the same now using the WordPress post loop to start populating our post blog content. We’ll do this in 2 places – on the home page we’ll have our most recent posts display with links to their individual content. We will also populate the content on the individual pages.

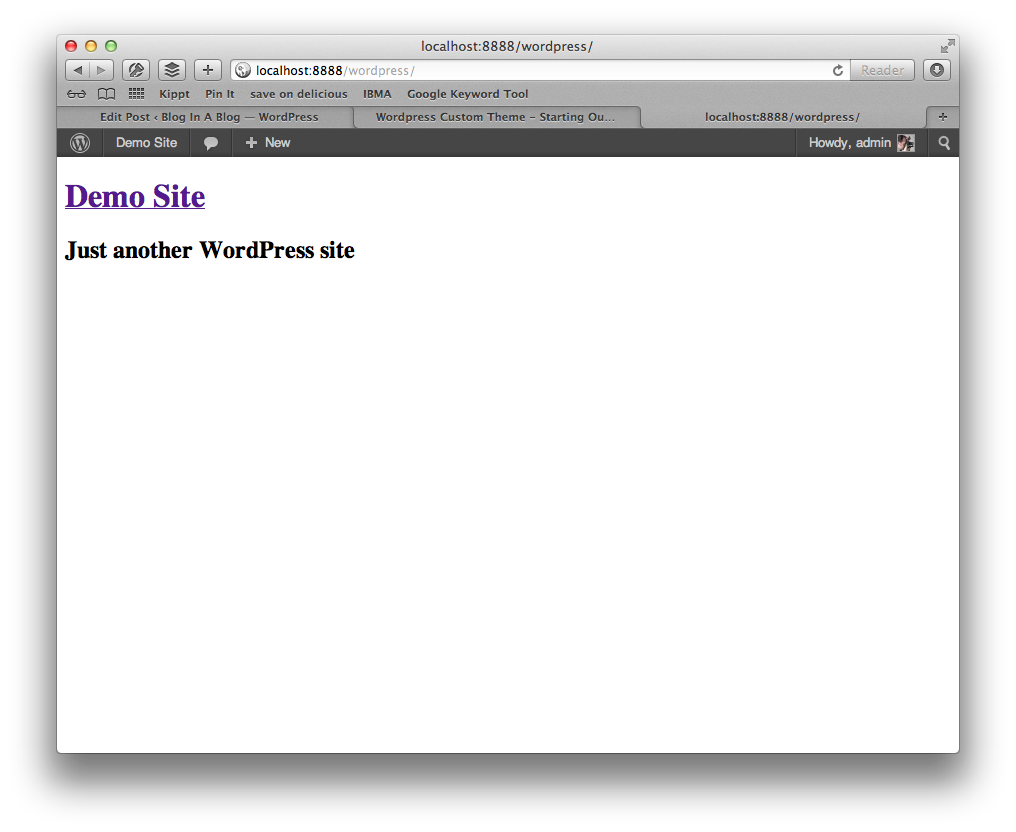
The first thing to do is open our index.php file again and put in the loop. Open index.php and paste in the following:

<?php

get_header();

?>

<!-- Start the Loop. -->
<?php if ( have_posts() ) : while ( have_posts() ) : the_post(); ?>

<div class="post">

<!-- Display the Title as a link to the Post's permalink. -->

<h2><a href="<?php the_permalink() ?>" rel="bookmark" title="Permanent Link to <?php the_title_attribute(); ?>"><?php the_title(); ?></a></h2>

<!-- Display the date (November 16th, 2009 format) and a link to other posts by this posts author. -->

<small><?php the_time('F jS, Y') ?> by <?php the_author_posts_link() ?></small>

<!-- Display the Post's content in a div box. -->

<div class="entry">
<?php the_excerpt(); ?>
</div>

<a href="<?php the_permalink(); ?>">&raquo; read more</a>

<!-- Display a comma separated list of the Post's Categories. -->

<p class="postmetadata">Posted in <?php the_category(', '); ?></p>
</div> <!-- closes the first div box -->

<!-- Stop The Loop (but note the "else:" - see next line). -->

<?php endwhile; else: ?>

<!-- The very first "if" tested to see if there were any Posts to -->
<!-- display. This "else" part tells what do if there weren't any. -->
<p>Sorry, no posts matched your criteria.</p>

<!-- REALLY stop The Loop. -->
<?php endif; ?>

<?php

get_footer();

?>

So we’ve done a couple of things here – we’ve opened the loop and told WordPress to start listing the posts. If you’re working with the default install of WordPress, you only have one post. You can create some more to see multiples listed.

We start the loop and give some conditions for categories and search. WordPress will by default use this for all three types of pages – the index page, category indexes and search results. We use some other code to bring in other parts of our post – the author, date, title, permalink, comments etc…

Now all we need to do is get the individual permalink pages working. Go back to the template folder and create a new file. We’ll save this as “single.php”. This is what WordPress looks for for displaying single pages.

In the single.php file, paste the following code:


<?php

get_header();

?>

<div id="content" class="narrowcolumn">

<?php if (have_posts()) : ?>
<?php while (have_posts()) : the_post(); ?>
<div class="post">
<h2 id="post-<?php the_ID(); ?>">
<a href="<?php the_permalink() ?>" rel="bookmark" title="Permanent Link to <?php the_title(); ?>"><?php the_title(); ?></a></h2>
<small><?php the_time('F jS, Y') ?> <?php the_author() ?> </small>
</div>
<?php the_content(); ?>

<?php comments_template( '', true ); ?>

<?php endwhile; ?>
<div class="navigation">
<div class="alignleft">
<?php posts_nav_link('','','&laquo; Previous Entries') ?>
</div>
<div class="alignright">
<?php posts_nav_link('','Next Entries &raquo;','') ?>
</div>
</div>
<?php else : ?>
<h2 class="center">Not Found</h2>
<p class="center"><?php _e("Sorry, but you are looking for something that isn't here."); ?></p>
<?php endif; ?>
</div>

<?php

get_footer();

?>

This code will populate the permalink content for each blog post and display all of its information and content. You can obviously modify these templates to your liking. Its really that easy.

In the coming articles, we’ll explore optional page and post templates. You might want a special post to have a slightly different look than the others and this is easily achieved with WordPress.

The WordPress Page Template

So in the last tutorial we looked at how the basic index template works in conjunction with the header and footer files on our WordPress site. In this tutorial I want to take a look at the WordPress page template. This might seem a little backwards in that most tutorials at this point go into blog posts, but I think its easier to start with pages in that its a little more simple.

Remember that the 2 building blocks of content types in WordPress page templates are posts and pages. Posts are canonical and go in a flow – they are added to often and frequently have very targeted, specific content. Pages are used typically to display general information about the site – are not dependent on any order and typically register as main parts of the website navigation.

Actually, we just built a page in the last tutorial – this was the home page. So our general WordPress page template won’t be much different. The home page could be (and usually is) used to display the most recent blog posts. That’s a little more than the basic, static page content we’re talking about here.

WordPress by default uses some basic template names. If we create a file in our template folder and call it page.php – WordPress will know to use that in the site for the main page template. We can also create additional templates if we want more variety and I will show you how to do this. They will need to be registered so WordPress will see them. But lets start with the built-in page.php.

1) Create a new file and save it in the theme directory. Call this file page.php

2) Paste the following code into the page.php file:


<?php
get_header();
?>

<!-- Page content will go here -->

<h2>This is a page template</h2>

<?php
get_footer();
?>

What we have done here is put in the exact same code as the index.php file, but we put the H2 statement in saying that this is a page template. Now if you log into WordPress admin and go to pages->sample page->edit you can see that WordPress came with a sample page set up. If you click “View Page” you will see our template is working with the H2 tag we put in. You won’t see this on the home page – that is the difference.

So now we need to put some content into our template so it will actually display something.

The WordPress Loop

To get content on your pages (and even posts) we’ll use what’s known as “The Loop”. WordPress brings many elements into your pages including the title, author, meta information, the post content or page content, comments if they are enabled, forms for new comments, etc. The technique for bringing all of these into a page is known as a loop. This is a PHP function that continues to bring in elements while the page is called until they are complete. On a page – the loop is very simple. Paste the following code into your page.php file – again between the header and footer blocks. You can delete the previous code we put in if you like:


<?php while ( have_posts() ) : the_post(); ?>
<h2><?php the_title(); ?></h2>
<div class="page-content">
<?php the_content(); ?>
</div>
<?php endwhile; // end of the loop. ?>

It may seem weird to do a loop for only one page, but this is how WordPress works and it stays consistent when we start working with posts. Inside the loop we call 2 functions – the_title() and the_content() – there are others we could use as well, but this simply displays the title and the content.

That’s it – go to your WordPress admin and select the sample page. Click “View Page” and you should see the page display!

You’ll notice our design is pretty bad, but don’t worry – we haven’t done any CSS work on this yet – we’re just getting the framework together.

Next we’ll look at creating menus so our pages will populate into the navigation.

WordPress Custom Theme – Template Files

In the last segment on WordPress custom theme structure, we outlined the essential files you’ll need for building a WordPress custom theme. In this tutorial I will show you how to build your first theme step by step.

The first thing you’ll want to do is set up a local install of WordPress. This will allow us to work much faster. You also don’t want to do this on a live website as things can break.

After you’ve setup WordPress and have everything working, we are ready to begin building our first WordPress custom theme. I want to build something very simple and elegant so we’re going to call our first theme “miniml”. Note the intentional misspelling.

So the first thing to do is to navigate to the WordPress install, go into the wp-content->themes folder. Lets create a new folder called “miniml”. If you are using a code editor like TextMate, Dreamweaver, BBEdit or Coda – this is a good time to set that folder up into your working environment to easily create files. In the screenshots that follow, I’m using TextMate set up this way. This folder is where all of the files for our WordPress custom theme will live.

1) Create the styles.css file

Lets create the styles.css file that tells WordPress about our new theme. Create the file and paste in the following code including the slashes and asterisk characters:


/*
Theme Name:
Theme URI:
Author:
Author URI:
Description:
Version:
*/

Fill this information out so WordPress will know your theme exists and what to call it. URI’s are links to author pages and WordPress custom theme pages if you have one set up. I don’t right now so I’m going to fill mine out like this:


/*
Theme Name: miniml
Theme URI: http://tedforbes.com
Author: Ted Forbes
Author URI: http://tedforbes.com
Description: My first WordPress theme!
Version: 1.0
*/

Later as we design our website, we will put CSS code into this stylesheet, but we don’t have a site yet so we’ll come back to this later.

Build the Template

Go ahead and create another new file. Save this in our template folder and name it index.php – we now have a stylesheet and a template file. If you navigate in your browser to wp-admin->appearance->themes you will now see our new theme listed! However we haven’t put any code in here yet so if you activate the theme it will just be blank. So we’ll need to start putting some code in our files to make the theme work.

WordPress Custom Theme – the index.php file

Lets open our empty index.php file and write some code. For now, go ahead and lets do an html5 skeleton. Place the following code into the document:


<!DOCTYPE html>
<html dir="ltr" lang="en-US">
<head>
<meta charset="UTF-8" />
<title></title>
<link rel="profile" href="http://gmpg.org/xfn/11" />
</head>

<body>

</body>
</html>

So this gives us a boilerplate for an html page in our new WordPress custom theme. Now what we need to do is put some code in here to make this dynamic for WordPress to populate. Lets start with the page title. This typically goes inside the <title></title> tags. Lets make that line look like this:


<title><?php wp_title(); ?></title>

The <?php ?> tells the server that you’re going to be writing some PHP code between the tags. What we are doing is calling a function built into WordPress that gets the page title. As we move along here we’re going to be calling a lot of functions that pull various content to our page from the WordPress database.

Lets add some more code – I’ll explain what each line does:

After the <link rel="profile" href="http://gmpg.org/xfn/11" /> – drop a line and add:


<?php wp_head(); ?>

This tells WordPress to bring in all the style sheets, RSS links and other information into the head of your document.

Between the body tags lets add the site title which will link to the home page and the site description functions. You do these by adding the following code:


<h1 class="site-title"><a href="<?php echo esc_url( home_url( '/' ) ); ?>" title="<?php echo esc_attr( get_bloginfo( 'name', 'display' ) ); ?>" rel="home"><?php bloginfo( 'name' ); ?></a></h1>
<h2 class="site-description"><?php bloginfo( 'description' ); ?></h2>

And while we’re at it – lets add the footer hook. You can customize these header and footer hooks, but for now they will bring in the admin bar so you can quickly get back to the admin interface if you need to. Under what we just added ad this line:

<?php wp_footer(); ?>

That’s it! So lets look at all of our code so far:


<!DOCTYPE html>
<html dir="ltr" lang="en-US">
<head>
<meta charset="UTF-8" />
<title><?php wp_title( '|', true, 'right' ); ?></title>
<link rel="profile" href="http://gmpg.org/xfn/11" />
<?php wp_head(); ?>
</head>

<body>
<h1 class="site-title"><a href="<?php echo esc_url( home_url( '/' ) ); ?>" title="<?php echo esc_attr( get_bloginfo( 'name', 'display' ) ); ?>" rel="home"><?php bloginfo( 'name' ); ?></a></h1>
<h2 class="site-description"><?php bloginfo( 'description' ); ?></h2>
<?php wp_footer(); ?>
</body>
</html>

You may now go to WP-Admin->Appearance->Themes and activate your theme. Click on “Visit Site” and you should see our basic page being displayed! There are no styles or anything fancy, but its working.

wordpress custom theme

Pretty cool huh? So what happened? When you go to your website, WordPress pulls files from a theme and populates content where it is asked to. We have no blog posts or pages yet – we’ll get to all the fancy stuff, but for now we’ll keep this bite-sized and say that we are now building our theme!

header.php and footer.php

One thing we need to do now is separate the header and the footer from this index.php file. We don’t want to have code duplicated all over our website, so we’ll put these in separate files and tell index.php to include them. We’ll do this with other page templates as well which is important. If we want to make changes, and we will, we only have to find the header and footer files. We don’t have to go through every file to change code. This is good coding practice. Its easy to do. Open a new file and cut and paste everything from the top of index.php all the way down to the close of the h2 tag we put in. Paste this into your new file and save it as header.php – then cut from <?php wp_footer(); ?> to the end of the index.php file. Paste this code into a new document and save it as footer.php –

Then go back to index.php and delete everything if its still there. Write the following code into index.php:


<?php

get_header();
?>

<!-- Page content will go here -->

<?php

get_footer();

?>

Save all the files and check your WordPress custom theme – nothing will look different really, but everything should work. We added a page comment that simply acts as a reminder when we go into the next section of where we should put our code.

Noticed I created the document first and then split it up. I like to work this way because its easier to think of the document as a whole rather than spread out over 3 separate documents. I like to make sure there are no errors first.

Typically in a WordPress site, the header and the footer stay the same on every page – that’s why we’ve split them like this.

In the next tutorial, we’ll start adding blog content! Stay tuned!

WordPress Theme Structure

Understanding basic WordPress theme structure is our first step in learning how to build a custom WordPress theme.

WordPress keeps all of the content files organized and separated from all the code that drives the content management side of things. This is nice because once you learn how this works, its makes it easy to make themes.

WordPress Theme Structure: The Bones

In your WordPress site folder you should find a folder called “wp-content”. This is where WordPress keeps themes, plugins, files and anything that is unique to your specific website. Inside the “wp-content” folder you’ll see a folder called “themes”. As you are probably guessing by now, this is where we will put our new theme that we are creating. You will see folders for all of the installed themes currently on the site. We can now begin by creating a folder for all of our theme files. If you would like – go ahead and create a folder called “custom-theme”. Notice that I used a dash instead of a space. This is actually a big deal when you’re working on any web server. Use letters and numbers only. Don’t use spaces. If you’re theme is two or more words like we just created, use a dash instead of a space. Spaces create problems for URLs.

Before we continue, lets look at a theme already in this folder so we can see how WordPress theme structure works.

If you open up the “twentytwelve” folder, we can look at what the various files do in a WordPress theme. Twentytwelve comes with WordPress. Its fairly advanced, well written and well organized. Lets learn a few things from this.

If we look in this folder, there are a few key files that stand out that we need to know about.

wordpress theme structure

What we see here are some folders and a ton of PHP files, JS files and CSS files. These files are mostly templates and extras that tell WordPress how to render the look and behavior of your website.

There are a few key files in the WordPress theme structure that are important for us to look at first.

style.css

The first one we need to look at is the style.css file. This file is required of all WordPress themes. You can use other stylesheets, but WordPress looks at this one to determine the name of your theme and other information. If we open this file, at the top you will see:

/*
Theme Name: Twenty Twelve
Theme URI: http://wordpress.org/extend/themes/twentytwelve
Author: the WordPress team
Author URI: http://wordpress.org/
Description: The 2012 theme for WordPress is a fully responsive theme that looks great on any device. Features include a front page template with its own widgets, an optional display font, styling for post formats on both index and single views, and an optional no-sidebar page template. Make it yours with a custom menu, header image, and background.
Version: 1.1
License: GNU General Public License v2 or later
License URI: http://www.gnu.org/licenses/gpl-2.0.html
Tags: light, gray, white, one-column, two-columns, right-sidebar, flexible-width, custom-background, custom-header, custom-menu, editor-style, featured-images, flexible-header, full-width-template, microformats, post-formats, rtl-language-support, sticky-post, theme-options, translation-ready
Text Domain: twentytwelve

This theme, like WordPress, is licensed under the GPL.
Use it to make something cool, have fun, and share what you've learned with others.
*/

This is the info that WordPress will use to display your theme in the theme selection page. If you don’t have this information in the style.css file – WordPress won’t see your theme.

screenshot.png

Also, on the theme selection page, WordPress displays a theme preview thumbnail. This is the screenshot.png file. Its optional, but when you’re done designing your theme, you can take a screenshot, save it as a png file called screenshot.png and WordPress will display this on the theme selection page.

functions.php

Another important file is the functions.php file. This file is used to write PHP code that can customize aspects of your site. This can get a bit advanced and you’ll need to understand some PHP to work with this, but its very powerful and important to highly customized themes.

Other Essential Files

Most of the other files here are page template files. If you open one of them (index.php for example), you’ll see a line of PHP code near the top that says get_header() and a line at the bottom that says get_footer(). Note that there is also a header.php file and a footer.php file. WordPress knows to combine these files inside a template.

This is done for consistency. Generally on a website, the header stays the same and so does the footer. This keeps the code from repeating itself in every file you create. If you want to change something, you only have to do it in one place. This is clean coding practice.

So that is the basic WordPress theme structure. This is what we need to understand to build a basic theme. In the next post, we’ll start our first theme. And, you probably have guessed, we’ll start by building these elements.

Create A WordPress Theme

Create a WordPress Theme

I thought it would be fun to show you how to create a WordPress theme. I thought the process would be fun to outline here as I can share it with others who would like to know how this is done. Before we get going, there’s a few things we should establish.

WordPress is a very powerful content management system. This is good because it gives you a great deal of flexibility in designing a highly unique website. The downside of this is that its time consuming and difficult if you’ve never done it. I’ll be splitting this whole process over a series of posts and will document the whole thing here for you.

If you don’t have the patience or you just need some tweaks done to an existing theme, you might consider developing a child theme. Child Themes allow you to make basic changes to other themes with very minimal effort. In a child theme you only write the changes you want for your main theme. WordPress knows to pull anything you don’t include from the parent theme so this makes it very simple if you only need some small changes.

But if you are willing to take the plunge, this can be a great experience and you’re sure to learn something as we go along. I will show you how to create a WordPress theme.

Create a WordPress Theme – Understanding WordPress

Before we begin to create a WordPress theme – I think its important to understand how WordPress works in general. This will help you with your design, wire framing, and overall concept.

Pages and Posts

The main building blocks of any WordPress site are the concepts of Pages and Posts.

Pages are what they sound like. They are just static pieces of content that usually sit in the main navigation of your website. The idea of pages is that they aren’t related to one another in any specific way.

Posts on the other hand are the heart of your blog. Posts are canonical by nature – this means that they are associated with dates and usually run in order of creation starting with the most recent. Think of this like a dairy or journal. Keeping a website up to date means you’re creating mostly “post” types of content. It keeps your site fresh, but the challenge is getting it all organized so visitors can find your information. WordPress gives us some tools for this in post formats, categories and tags. Content creators can use these tools to group content and make things easy to find for the site visitor.

WordPress now also supports custom content types. This becomes more advanced and it is useful. However – I do recommend that before you start setting up custom content types, ask yourself if you can get the same result simply using posts and pages.

So think of it like this – as we create a WordPress theme, Pages are pillars of your website with general information. Posts are content that gets created frequently and constantly. Posts can be sorted in different ways so defining categories and tags is a great way of separating and organizing this type of content.

What You Need To Begin

I like to keep my tools simple. You’ll need a decent code editor. I like TextMate personally, but you could use something like Coda or BBEdit as well. Use a code editor and not a plain text editor as there are better features including colored code text.

You’ll probably want to set WordPress up running locally on your computer as well. Its a pain to constantly upload files to a server so this is a faster way to work.

When you do want to upload files to the web host, you’ll want a decent FTP program for doing this. My personal preference is Transmit by Panic Software.

Other than that you’re ready to go!

Coding Langages

I’ll be walking you through this process, but most likely you’ll want to have a basic understanding of HTML, CSS, Javascript and PHP. WordPress uses lots of custom functions which end up being almost its own coding language. We’ll be learning this as we go.

So get ready! In the next part, I’ll discuss how themes are structured and we’ll start on our first theme!

WordPress Hosting

WordPress hosting is a very important decision to make. Moving your blog to a new host is never fun, and you need the right combinations of features, speed and support to make the decision that’s right for you. I’ve been developing websites since 1998 and I’ve been working with WordPress since it was introduced in 2003. I’m going to give you reviews of my favorite 3 options as I’ve used all of them personally. I’ve actually used some others, but these are the 3 that I’ve come to trust and recommend to my friends. So which is right for you?

In this article, I’ll be reviewing 3 major hosting services. I currently pay for accounts on all of them and have for quite some time. I’m going to share my personal experiences with each of them so you can better decide which one is right for you.

We’ll be looking at:

MediaTemple

BlueHost

Dreamhost

WordPress Hosting – What To Look For

Wordpress Hosting

So what is important to look for in WordPress hosting? There are several factors. First of all – WordPress is a content management system built on PHP and MySQL. If you don’t know what that means, PHP is the coding language that makes it all work and MySQL is the type of database that stores things like posts and pages. The good news is that WordPress is wonderfully coded and its light weight. This means that the performance is really good from a coding perspective which makes it easy to host making WordPress hosting very simple. This is comforting if you’re not technically minded.

What you’re looking for is what’s called a “shared hosting” account. This simply means that the cost comes way down as the hosting company will host multiple sites on the same server. The downside is that some shared hosts pile thousands of sites on the same server and you’ll notice your performance is terrible as soon as a few of those start running custom scripts or even just start getting a lot of traffic. All 3 of the options I’m going to discuss below I’ve never had this problem with. In fact that’s the first factor that ruins a host for me so I’m not about to recommend a service that I’ve had problems with.

The other option is dedicated hosting. Dedicated means you have your own machine all to itself. Virtual Dedicated usually means that you’ve got a virtual machine – you might still be sharing, but you’ll have full resources allotted to your “virtual machine”. All of these hosts offer dedicated hosting plans, but they are considerably more expensive. However – if you’re blog gets big and successful which we all want, its nice to be able to stay with the same hosting service and just upgrade that way. Most hosts offer easy ways to migrate. So that’s something to just keep in mind. You will hopefully need it one day when you’re getting 100,000 views a day so its there. For now, you can get all the performance you need at a very low cost. This is smart business. But remember that WordPress hosting isn’t resource intensive – you’ll be surprised at the milage you get from any of the shared plans.

The last thing to look at is features. All of these hosting services offer “One Click Installs” which makes WordPress hosting a breeze to setup. Its literally one click. After you get your account you can hit a button and it will install WordPress for you automatically. This is a huge time saver. All three services have this. The feature where they all differ is the control panel that you will use to set up things like email accounts and do your billing. I don’t think any of these is better than the others, but I will tell you about them so you can find the one that’s right for you.

Full disclosure: I currently pay for hosting accounts with all 3 of these services. I’ve used each one for WordPress Hosting. I use them daily for various clients and personal projects that I work on. The links here are affiliate links. This simply means that if you click one of these links and sign up for the service, I do get a recommendation fee. This doesn’t cost you a dime and it helps offset the costs of keeping this blog. You can help me continue to offer free content and show you more awesome things about how to run a better blog. As I said – I pay for my own accounts on all three services for a variety of projects. I wouldn’t recommend a service that I wouldn’t actually use myself.

So lets look at my personal favorite 3 options:

WordPress Hosting – The Top Three Choices

1) MediaTemple

MediaTemple WordPress Hosting

MediaTemple was the second hosting company I ever signed up for. The first was so horrendous and I even found out that it was run out of some guys living room. Needless to say, MediaTemple was a godsend when I started using them. I’ve had 2 accounts with them for over 10 years now. I’ve got their Grid service account and I also have a DV server for some high traffic clients.

The service you want is likely the Grid service. I started on this in the early days and its come a long way. The Grid is a type of shared hosting that has a better distribution of resources for traffic. This means the performance is quite good and it is. With the service you get:

“One Click” WordPress Installs
100 GB premium storage (this is more than you’ll ever need)
1TB network transfer (again this is plenty)
Host up to 100 domains
1000 email accounts
Money Back Guarantee

The control panel and billing system is all built and maintained by MediaTemple. Its extremely simple and might be the best option for people who want to keep things simple. There’s fewer options than the others, so power users might not find this up to their liking, but the basics are more than covered. They have a ticket system for support and a toll free number. I’ve had some long hold times when I’ve needed things, but the staff are polite and helpful. Problems are always solved within the first call. Because the phone wait can be time consuming, I usually just use their ticket system which is still fast and simple. They also have a wonderful kept knowledge base. Lots of times I can fix problems myself by searching and reading the knowledge base first.

One day when your site becomes a big money maker with tons of traffic, you can easily upgrade to one of their virtual dedicated or dedicated servers very easily.

» View MediaTemple Plans

2) Bluehost

Bluehost WordPress Hosting

Bluehost is my current favorite. The customer service is outstanding and that’s main reason WHY they’re my current favorite. Last summer I got an account with them just to see if it was something I would support. The same day they called me and went over the billing (which was insanely cheap) just to make sure I was happy, set and didn’t buy options I didn’t need. We actually found one I included by accident and they gave me a refund on the spot. Very impressive. They are very personal, well staffed and obviously take customer service seriously. That’s the biggest plus for me. When there’s a problem, its nice to have people there to help.

With Bluehost you get:

“One Click” WordPress Installs
Unlimited Disk Space
Unlimited Bandwidth
Free Domain Name for 1 Year
Unlimited Email
SSH Access

Okay – lets talk about unlimited for a second. This is standard for hosts to offer – even MediaTemple who have defined limits. If your site starts rocking 100,000 visitors a day – they will probably ask you to move to a dedicated plan because you’ll be hogging resources. I’ve never hit this limit, if you are you’re making money on your site so this isn’t a problem. You also need to keep files related to the website to meet the “unlimited” umbrella. This means you can’t host a video podcast that gets popular or trade AC/DC MP3’s with your friends. This is all for files you use on your site and that fall in the realm of legal activity. Having said that – don’t worry – you won’t hit the limit anytime soon.

Bluehost uses CPanel for their backend. Not as elegant as MediaTemple, but its very powerful and gives you a TON of options for your server setup. They also offer 3 types of webmail clients if this is your thing.

I love Bluehost – they are great. If you would like to see a Bluehost setup in action, I created a video where I built an online photography portfolio in 5 minutes.

» View Bluehost Plans

3) Dreamhost

Dreamhost WordPress Hosting

Dreamhost are one of the industry leaders as well. They know hosting and do it well. Set up is a breeze. I actually can’t tell you how their customer service is because I’ve never had to use it! I’ve had my Dreamhost account for the last 5 years. I recommend them all the time. The biggest difference with Dreamhost is they wrap all their billing and server options into CPanel. Its extremely powerful, but its not as intuitive as the elegant MediaTemple. BUT – the search is very good so I’ve never had too much of a problem. I’ve never used their customer support, but I’m sure its fine.

With Dreamhost you get:

Unlimited Everything – but within the limits I mentioned above ;-)
Free Domain Name

» View Dreamhost Plans

Feature Summary

Okay – so my suggestions for hosting are as follows:

Bluehost offers the best support and best mix of options.

MediaTemple Grid Service is the easiest to use, customer service is good but you’ll wait in line a little

Dreamhost offers the most options for your account. I’ve never needed customer service – this says something.

So check out the pricing – all are competitive and wonderfully inexpensive and decide which one is the best for you.

Have you had any experience with the above hosts? Feel free to leave a comment below.

Install WordPress On A Mac

install wordpress on a mac

Its often useful to run a local install of WordPress for development and testing. If you’re making changes to a theme or plug-in its a good idea not to work on the live site unless you can live with it if you break something. I usually work on sites locally before I launch them this way as well as its just faster not having to deal with FTP. You can work locally on your computer and technically you don’t need an internet connection. This can be nice if you’re working on projects while traveling as well. So lets see how to install WordPress on a Mac.

And for the record you can do this same thing on Windows computers as well – I’ll explain the difference below.

How This Works

WordPress is written in PHP as a content management application. It is designed to run on a web server such as Apache with PHP and MySQL installed properly. There are a number of ways you can do this on your Mac, as the OS is already running a web server you can use. In the old days this required some knowledge of terminal shell commands to get this working. Now I just use MAMP because its easy.

Typically a web server is made of some kind of “stack” as they say in the business. Developers refer to their setup as a stack much like a truck driver has his rig or a guitar player has his axe. A stack is a combination of software that makes it possible to run the website. A common “stack” is a LAMP stack. The acronym implies Linux, Apache, MySQL and PHP. Get your LAMP stack rolling and you’re ready to host a website.

Using MAMP to Install WordPress On A Mac

There are two apps that simulate this on your computer. MAMP for Mac and WAMP for Windows. Get it? Instead of Linux, there’s other flavors.

So if you’re on a Mac, go download, install and launch MAMP
If you’re on Windows, you want WAMP

MAMP or WAMP basically starts a web server locally on your computer.

You’ll need to know where all the web files will live so you can develop locally. On the Mac, the web server files are in Applications » MAMP » htdocs

On Windows you’ll need to double check on the WAMP site, but on Windows 7 they are in the following directories:
32 Bit | C Drive » Program Files » wamp » www
64 Bit | C Drive » Program Files (x86) » wamp » www

Once running, you go to your web browser and go to http://localhost:8888 on a Mac or just http://localhost on Windows to access the root directory of your web server. This is how you see the files you’re working on – its not online but lives on your local drive. This is how you see it in the browser.

Install WordPress

1) Download WordPress
2) Open Applications » MAMP « htdocs and create a new folder for your project – name it something useful
3) Copy the files from WordPress into this folder
4) On the Mac, when you launch MAMP you will get the start window in the browser. Go over to phpMyAdmin and create a database for your WordPress install.
5) In the WordPress project, rename wp-config-sample.php to wp-config.php
6) Fill in the fields to define the DB_NAME, DB_USER, DB_PASSWORD AND DB_HOST variables. The DB_NAME should be the database you created in step 4. The user is ‘root’ and the password is ‘root’. Make sure DB_HOST is localhost
7) Go to http://localhost:8888 in your browser and you should see your project in the list.
8) Open your project and WordPress should prompt you for the set up

That’s it!

How To Make Money With Adsense

how to make money with adsense

Google Adsense is a platform that provides an easy way for people to start monetizing their websites. I started using Adsense on various projects a few years ago, and like many I became very frustrated. Can you make money with Google Adsense? Sure. Can you quit your job and “reap the benefits” like so many sites say? Yes. So how is this done?

Its really important to understand the business side of Adsense, how it works AND determine if it is right for you.

Google Adsense is kind of a sister to its other program Adwords. This is how it works. Adwords works on an auction principal. If I need to get traffic to my business, I can bid for keywords that come up in searches. The more people bidding, the higher I’ll need to pay for the volume of traffic I need.

Adsense allows content creators to make money when these ads are placed on their website. Simple concept. Google takes a cut and you get paid because someone clicked on that ad on your site.

This sounds like a great way to make money online and it is. But the problem is the amount of frustration I see in forums or YouTube with people who either got their accounts deleted or on the other side – simply didn’t make the money they thought they might be making.

So lets take a step back. I’ll share my experience and lets see how someone can make money with Adsense.

How To Make Money With Adsense

Its easy. Making money could be 10 cents a month or $15,000 a month, but you can make money. How much money you make involves the following criteria:

1) Traffic on your site
2) Word auction values (see above – its an auction)
3) The type of content you’re creating (most important)

Lets break these down:

1) Traffic –

Okay its the most obvious – the more traffic you have on your site, the more money you’ll make on ads. Period. Google knows what this is – they look at IP’s, traffic and all kinds of criteria to make sure someone’s not click-bombing. Click-bombing is clicking on your own ads all day in an effort to generate cash. Its illegal to Google TOS and they will cancel you for doing this. Look at the thousands of looser kids on YouTube bitching away about how they made all this cash and Google took it away. I know this sounds snarky and harsh, but traffic is key to making anything significant. You need to develop that if you don’t have it. BUT – its very important that you consider the next 2 guidelines.

2) Auction Value –

Certain keywords are more valuable than others. I’ll give you an example. Apple puts out the new iPhone 5 and there are a ton of companies making cases that will fit. They bid to purchase keywords like “iPhone 5” and “iPhone 5 accessories” and “iPhone 5 case” to get instant traffic on their product pages. There’s a ton of competition for those terms and the prices go up. So if you’ve got a popular blog on the iPhone 5 and you run Adsense – you’ll do well. How to make money with Adsense is dependent on volume and trends of keywords. If you’re seeing 2,000 hits a day on your iPhone 5 blog – you’ll see money. But you’ll need to have an established iPhone 5 or at bare minimum – a popular tech or mobile phone blog to be in this position. This takes years sometimes to do. You won’t just throw something up and expect to bank on it.

3) The Type of Content You Create

The opposite is when I see people complain that they have hits and don’t make money – and then I see their site is a poetry site or some personal blog about their desert recipe collection – well that’s not a high bidding niche. I’m sorry but you’re not going to see the iPhone 5 bid wars over your site. Your site might be great – I’m not arguing, but from a business view – it doesn’t work. You could probably monetize your site through affiliates and come out much better – but this is work and most people would rather complain about Adsense than figure out an alternative. How to make money with Adsense is going to be really difficult because your site subject doesn’t do well with how Adsense works. This brings me to another issue – Adsense is easy to put on your site. It attracts lazy people. This is why you see a lot of complaints.

And finally one of the silent factors that determines how to make money with Adsense:

What does your audience do on your website? If you’re providing excellent information that helps people – they might not be looking for something else. Therefore the concept of clicking on keywords might not be something they are going to do at all. You could have high traffic with a low click thru rate and this is not how to make money with Adsense.

My Own Experience

I put Adsense on one of my first sites. The first month I made like 2 cents. It continued on like this – eventually making like $1.20 a day. Well – for work I didn’t have to do that’s not bad really. But I lost interest pretty quick. The site is a niche photography website and I’ll go ahead and say – I offer an incredible amount of information for free. After a few years I built the site up and out of nowhere I started making money that was more than $1.20 a day. It was more like enough to cover my water bill. Not crazy money, but it was okay. My traffic went way up because I had gotten more serious about SEO. This is good, but see the problem I have is that people come to my site to learn about photography – not to buy new equipment which is what most of the Adwords center around. But then something started to work a little better: video.

I started putting up my podcast on YouTube and linked my YouTube account with my Adsense account. My site doesn’t do well with Adsense for the reasons I’ve listed above – but YouTube is a different beast because it sells in-stream commercials. Sometimes people click through these and sometimes they don’t. I’m not filthy rich on Adsense at this point, but its gone from covering the water bill to covering the power bill, internet bill AND my cell phone bill which is not bad.

I don’t think this particular site is going to ever be a big money machine with Adsense and that’s okay. I’m actually thinking about killing Adsense since my affiliates do much better. Which brings me to my last point about how to make money with Adsense.

If you’re passion fits the type of site that Adsense works best with and you hang in there and get the traffic you need – you’ll do just fine. You will make money on Adsense.

If you can’t meet the criteria above – then you need to consider other avenues. Adsense might not be for you. Its okay. Don’t be lazy. Think about who you reach. And finally find a way to monetize to pay for all the hard work you put into your site. I will discuss other avenues of monetization in future posts.

You might notice I’m not running Adsense on this website. I don’t think its a good fit or a good subject considering I talk about blogging which is a free thing for the most part. Its a little test I’m doing – when its time to monetize I’m going to try and do it without the almighty Google. Stay tuned – eventually I’ll divulge all the details.

WordPress Theme SEO

WordPress Theme SEO is a very common concern from people who are setting up new sites. Particularly if generating traffic is a top concern. And lets be honest – who doesn’t want to generate traffic? Its a valid question though and worth taking a look at WordPress Theme SEO and what matters.

Are We Asking The Right Question

Wordpress Theme SEO

Allow me to explain. I heard Matt Mullenweg as a fellow speaker at Le Web back in 2010. It was a great presentation as I’m a huge WordPress fan and I’m happy to sit and listen to the brains behind the platform talk about statistics. Matt mentioned that WordPress is like the “dark fibre” of the internet. Its not hip and cool like Facebook or Twitter. There’s no big IPO or anything that the nightly news is interested in. But the proliferation of sites on the web using WordPress as a CMS is astonishing. WordPress currently is used by over 16.7% of the top 1 million websites on the internet. In 2011 it made up 22% of all new websites. I’ll save you the math and say that this is a TON of websites.

There are a number of reasons why these numbers are so high. “Ease of use”, “its free”, “its familiar” and many more reasons make up why people chose and use WordPress. But its hard to argue the core fact that they got a lot right.

WordPress is extremely good at SEO right out of the box. I promise. It formats correctly. It categorizes for you. It tags. WordPress is an outstandingly solid platform. Themes don’t need to improve the SEO. In fact, I would argue that a poorly designed theme would actually hurt SEO if there was any damage at all.

So the right way of looking at this isn’t really at what theme is best so much. Its looking at which theme is worst.

There are thousands and thousands of themes available. Again – WordPress is flexible that way. If there are any themes to be worried about – I’d have to argue it would be some of the free ones. I know we’re all on a budget and you could argue that paid themes aren’t always what they seem… so what do you look for in a theme?

The Extent of WordPress Theme SEO

As long as your theme renders categories and all of the WordPress post data – you’re probably okay. Google doesn’t care so much about how your site looks as much as people might so this is a moot point. Get a minimal theme that supports functionality and looks nice – you’ll be fine.

In fact – I start new sites using the WordPress built-in twentytwelve theme. Its simple and elegant. And it supports all that WordPress offers on the 3.5 and up versions. This might be an important lesson – Google and Bing don’t care what theme you’re using. I would argue – go ahead and use the default! You’ll spend more time writing and less time fooling around with themes and design.

So – if WordPress Theme SEO isn’t as big a concern as we thought – where can we spend time worrying?

Well – WordPress does a pretty good job right out of the box. You can look at some good WordPress SEO Plugins and get a lot of mileage. Learn to use the SEO plugins and give your potential audience good content first. You can customize and fiddle about with themes after you start seeing some traffic. This is the point of using WordPress to begin with.

Customizing A WordPress Theme

Customizing A WordPress Theme

Customizing a WordPress theme is generally on the wish list of anyone who is using WordPress to power their website. Most people hack into the theme files and try to make modifications to get things to look the way they want them. While this seems to be the way to do this it creates a secondary problem. Often times theme authors (including WordPress for its own default themes) will issue theme updates. If you’ve made any changes, the update breaks them and replaces them.

For this reason, WordPress uses a system called Child Themes. As the name implies, Child Themes are dependent on an installed Parent Theme. This might seem confusing, but its a great, simple way to make modifications that will be safe from future updating. Child Themes are a very simple concept and easy to write.

Lets say you’ve found a great theme, but there’s some simple thing driving you nuts. Perhaps you don’t like the font. Maybe the post title text is the wrong color. You don’t want the site to say “powered by WordPress” in the footer. The simplest way to fix this is by writing a Child Theme. Lets take the last example of removing the “powered by WordPress” text on the bottom of every page.

Customizing a WordPress Theme With Child Themes

Create a folder on your FTP server in wp-content/themes/ and name it what ever you like. I usually name it after the website to keep it clear.

Create a file in this folder called style.css – this is important. The file must be called “style.css”.

Open this file and paste the following – make changes where noted:

/*
Theme Name: The name of your child theme - could be anything
Theme URI: The URL for your website - if you're not distributing this child theme this isn't important
Description: Child theme for the Twenty Twelve theme
Author: Your Name
Author URI: A link to your website
Template: twentytwelve
Version: 0.1.0
*/

The important lines in here are the Theme Name and the Template. The Template must be the proper name of the parent theme or this won’t work.

Below this, paste the following code:

@import url("../twentytwelve/style.css");

This tells WordPress to bring in the stylesheet of the parent theme. Now any CSS you write in this file will override the Parent Theme styles. You could completely rewrite the stylesheet – if that’s what you want to do, skip the import line, but this tutorial is for people who want to make small changes.

You now have a Child Theme set up – congratulations! Go back to the WordPress Admin and activate your new Theme.

So how do you start making changes? For CSS styles, add styles to the style.css file we just created. These will override the parent styles.

For template changes, copy the Parent Template into our new Child Theme folder and make your changes there. Because WordPress knows this is a child theme, it will override any parent template files with files in this folder. We want to take out the “powered by WordPress” statement, so copy the footer.php file from the twentytwelve them into your new child theme folder. After you’ve copied this file, make changes to the file in our new Child Theme. WordPress will ignore the old one.

If you open the new footer.php file you copied, you should see:

<?php
/**
* The template for displaying the footer.
*
* Contains footer content and the closing of the
* #main and #page div elements.
*
* @package WordPress
* @subpackage Twenty_Twelve
* @since Twenty Twelve 1.0
*/
?>
</div><!-- #main .wrapper -->
<footer id="colophon" role="contentinfo">
<div class="site-info">
<?php do_action( 'twentytwelve_credits' ); ?>
<a href="<?php echo esc_url( __( 'http://wordpress.org/', 'twentytwelve' ) ); ?>" title="<?php esc_attr_e( 'Semantic Personal Publishing Platform', 'twentytwelve' ); ?>"><?php printf( __( 'Proudly powered by %s', 'twentytwelve' ), 'WordPress' ); ?></a>
</div><!-- .site-info -->
</footer><!-- #colophon -->
</div><!-- #page -->

<?php wp_footer(); ?>
</body>
</html>

Simply remove the lines that read:

<?php do_action( 'twentytwelve_credits' ); ?>
<a href="<?php echo esc_url( __( 'http://wordpress.org/', 'twentytwelve' ) ); ?>" title="<?php esc_attr_e( 'Semantic Personal Publishing Platform', 'twentytwelve' ); ?>"><?php printf( __( 'Proudly powered by %s', 'twentytwelve' ), 'WordPress' ); ?></a>

You could replace those lines with something else if you want – I usually add a footer menu here so I can link to things like privacy policies, but you could leave it blank as well.

So that’s it! Next time WordPress updates the Twenty Twelve theme you won’t start seeing “powered by” again because your new Child Theme will remain untouched.

Chances are you’ll be making further modifications which is great. If these files were overwritten you’d loose them all which is the whole purpose of using a Child Theme.